

Planning a kitchen renovation is exciting, but getting it right before you tear out a single cabinet requires seeing your vision in three dimensions first. Creating a 3D kitchen design lets you walk through your new space digitally, catch expensive mistakes before construction starts, and experiment with layouts, finishes, and appliances until everything clicks. The good news? You can design your entire kitchen in 3D yourself using free or affordable software, even if you’ve never touched a design program before.
This practical guide walks you through the complete process of building your own 3D kitchen design from scratch. You’ll learn which tools work best for beginners, how to measure your existing space accurately, and the exact steps to create a realistic digital model that includes everything from cabinets and countertops to lighting and backsplashes. Most homeowners complete their first basic 3D kitchen design in 4 to 6 hours, though you’ll likely spend more time tweaking details once you see how easy it is to test different ideas.
The transformation happens when you move beyond flat floor plans and sketches. Three-dimensional visualization reveals whether that island you love actually blocks the refrigerator door, if your new cabinet configuration creates awkward corners, or whether the pendant lights you picked hang at the right height. Contractors and kitchen designers have used this technology for years, but in 2026, the barrier to entry has dropped so low that anyone with a tape measure and a weekend can produce professional-quality renderings.
We’ve gathered insights from kitchen designers, DIY renovators who’ve been through the process, and software experts to give you a clear roadmap. Let’s start with what you’ll need to gather before opening any software.
What You’ll Need: Tools and Software for 3D Kitchen Design
Getting started with 3D kitchen design requires less equipment than you might think, and you probably already own several of the items you’ll need. The right combination of digital tools and basic measuring supplies will set you up for success, whether you’re working on a tight budget or ready to invest in premium software.
For measuring and planning, you’ll need a reliable tape measure (25-foot minimum), a notepad or smartphone for recording dimensions, and optionally some graph paper if you like sketching ideas before going digital. A laser distance measurer can speed things up, but it’s not essential. Take photos of your current kitchen from multiple angles, these become invaluable reference points when you’re working on your design.
Your computer needs to handle 3D rendering without grinding to a halt. Most modern laptops work fine, but aim for at least 8GB of RAM, a processor from the last five years, and a decent graphics card if you plan to create photorealistic renderings. Tablets can run simpler design apps, though you’ll have more control with a mouse or touchpad than working entirely with your finger.
- Free software: SketchUp Free (browser-based, beginner-friendly), IKEA Kitchen Planner (limited to IKEA products but intuitive), and HomeByMe (good visualization, some features locked)
- Paid software: SketchUp Pro ($299/year, professional features), Chief Architect ($2,695 one-time, contractor-grade), and 2020 Design (subscription-based, extensive manufacturer catalogs)
- Physical tools: 25-foot tape measure, notepad or phone for notes, laser distance measurer (optional), level for checking floor slopes, and smartphone camera for reference photos
The software you choose depends on your comfort level with technology and how detailed you want your design. Free options work perfectly well for most homeowner projects, you’re not trying to impress architectural review boards, just visualize your new kitchen clearly enough to make confident decisions. Many people start with a free tool and only upgrade if they need specific features or manufacturer-specific cabinet catalogs. The Gage Furniture community has found that spending time learning one program thoroughly beats jumping between multiple platforms.
Before You Start: Important Safety and Planning Considerations
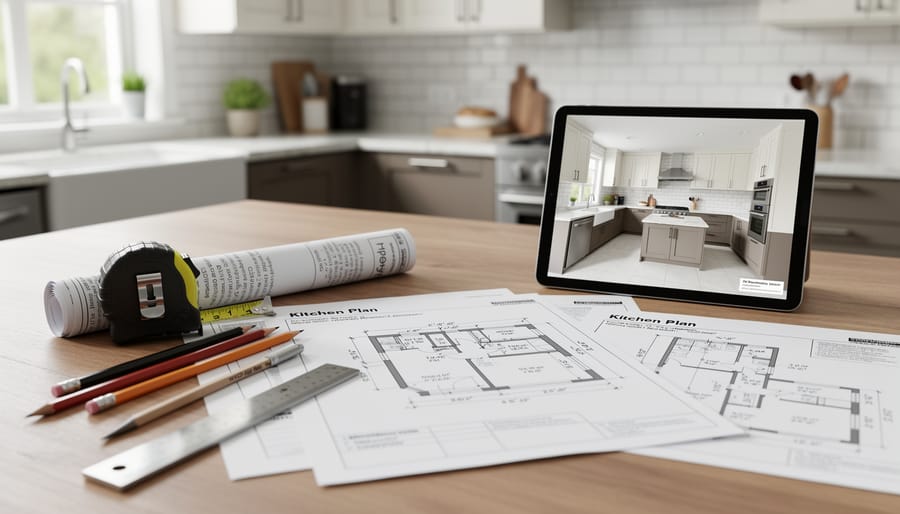
Before you dive into digital design, it’s crucial to understand the real-world constraints that will shape your 3D kitchen layout. While design software makes it tempting to move walls and reconfigure spaces freely, every change you model has potential safety, structural, and legal implications in your actual home.
Start by identifying which walls in your kitchen are load-bearing. Removing or altering these requires an engineer’s approval and proper support structures. Your beautiful open-concept design could compromise your home’s structural integrity if you’re not careful. Similarly, relocating major appliances means moving gas lines, electrical circuits, or plumbing stacks, work that requires licensed professionals and building permits in most jurisdictions.
Local building codes dictate essential requirements like minimum aisle widths, ventilation standards, and electrical outlet placement. The work triangle principle isn’t just design theory; it’s rooted in safety codes that ensure you have adequate clearance between your sink, stove, and refrigerator. Most codes require at least 42 inches between opposing counters for safe traffic flow.
Take accurate measurements before you start designing. A two-inch discrepancy might seem minor on screen, but it means your new refrigerator won’t fit or cabinet doors will block each other. Measure twice, measure the height of windowsills and door swings, and note the exact locations of existing outlets and switches. Document any quirks like sloped floors or walls that aren’t perfectly square.
Research your local building department’s requirements early. Some jurisdictions require plan approval even for cosmetic kitchen updates, while others have strict rules about appliance ventilation or counter materials near heat sources.
Step-by-Step: Creating Your 3D Kitchen Design
Step 1: Measure Your Kitchen Space Accurately
Start by measuring each wall of your kitchen from corner to corner using a metal tape measure, which won’t stretch like fabric versions. Record these measurements in inches and write them down immediately, don’t trust your memory. Measure the height from floor to ceiling at multiple points since older homes often have uneven floors or ceilings.
Next, document the exact placement and dimensions of all windows and doors. Measure the width of each opening, the distance from adjacent walls, and the height from the floor. Note which way doors swing, this affects cabinet placement more than you might think.
Mark the locations of electrical outlets, light switches, and plumbing connections on your floor plan sketch. Measure their distance from two walls to pinpoint their exact position. Take photos of these elements from multiple angles as visual references later.
Don’t forget immovable features like radiators, vents, and support columns. Measure any existing cabinets or appliances you plan to keep, including their depth, since this impacts your traffic flow.
Pro tip: measure everything twice and add photos to your notes. Those five extra minutes now prevent costly mistakes when you’re placing virtual cabinets in your 3D software.
Step 2: Choose and Set Up Your 3D Design Software
With your measurements in hand, it’s time to pick the right design software for your skill level. If you’re brand new to 3D design, start with SketchUp Free or Planner 5Dboth offer intuitive drag-and-drop interfaces that don’t require design experience. More adventurous beginners might try IKEA Kitchen Planner (great if you’re using their cabinets) or RoomSketcherwhich balances simplicity with more advanced features.
Creating your account takes just minutes. Most free platforms require only an email address to get started. Once you’re in, spend 10-15 minutes exploring the workspace before diving into your project. Look for the toolbar, usually along the top or left side, where you’ll find basic tools like “Add Wall,” “Insert Object,” and “Measure.” Most platforms offer a tutorial or sample project; run through it quickly to understand how zooming, rotating the view, and selecting items works.
Don’t skip this familiarization step. Knowing where to find cabinets, appliances, and materials before you start building saves significant frustration later. The interface might feel overwhelming initially, but you’ll only use about six core tools for most of your design work.
Step 3: Input Your Kitchen Dimensions and Build the Room Shell
Start by opening a new project in your chosen software and locating the room creation or floor plan tool, most programs place this in a clearly labeled menu or toolbar. Enter your overall kitchen dimensions first: input the length and width to establish the basic rectangular footprint. Many programs let you type numbers directly or draw walls by clicking points; use the direct input method when available since it’s more precise than mouse-drawing.
Next, place your walls at the correct positions. If your kitchen isn’t a perfect rectangle, add or adjust wall segments to match your actual space. Pay attention to wall thickness settings, most interior walls are 4-5 inches thick, but check your measurements if you have masonry or exterior walls.
Now add windows and doors at their measured locations. Input the exact width and height for each, and note which direction doors swing since this affects cabinet placement later. Position windows at their actual height from the floor, standard is around 36 inches for kitchen windows, but yours may differ.
Real kitchens have quirks: slightly crooked walls, corners that aren’t quite 90 degrees, or uneven ceiling heights. If your measurements revealed irregularities, adjust individual wall angles or create custom ceiling planes. Don’t round everything to “close enough”, these small differences matter when cabinets arrive and need to fit perfectly.
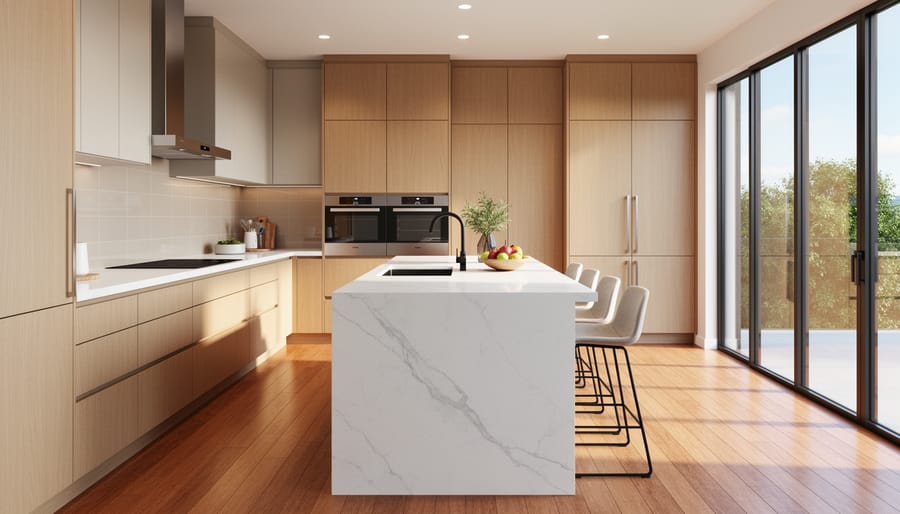
Step 4: Add Cabinets, Appliances, and Fixtures
Now you’ll bring your kitchen to life by populating the shell with actual elements. Most 3D software offers built-in libraries of cabinets, appliances, and fixtures, start there. Browse by category (base cabinets, wall cabinets, refrigerators) and drag items directly into your floor plan. Many programs connect to manufacturer catalogs, letting you drop in exact models with real dimensions, which proves invaluable before buying furniture or finalizing appliance choices.
Place your sink, stove, and refrigerator first, these anchor the kitchen work triangle, ideally forming a path between four and nine feet per leg for efficient movement. Position the sink near existing plumbing if possible, then add base cabinets along walls, leaving 36 inches of clearance for walkways. Stack wall cabinets above, typically 18 inches from the countertop. If a cabinet doesn’t fit perfectly, most software lets you adjust width, height, and depth in the properties panel.
Pay attention to door swing and drawer pull-out clearances, your 3D model should show conflicts when a dishwasher door would block a walkway. Think about your cooking workflow: do you need a prep zone near the sink, or counter space beside the stove? Some designers reference traditional joinery techniques when selecting cabinet construction, but focus now on layout and function. Rotate items with your software’s rotation tool, duplicate identical cabinets to save time, and step back frequently to view the whole space, you’re arranging a room you’ll use daily, not just filling empty walls.
Step 5: Customize Materials, Colors, and Finishes
Now it’s time to bring your kitchen design to life with materials and colors. Most 3D software includes extensive libraries of realistic textures, browse through options for granite, quartz, or butcher block countertops by clicking directly on surfaces in your model. You’ll see an immediate visual update that helps you compare choices side-by-side.
Start with your largest surfaces first: cabinets and countertops set the tone for everything else. Select a cabinet finish, then choose a countertop material that complements rather than matches exactly. Add flooring next, keeping in mind that lighter tones make small kitchens feel more spacious, while darker floors hide dirt better and may require less frequent safe cleaning in high-traffic areas.
For wall colors, test several options using the software’s rendering feature, the same shade can look dramatically different under various lighting conditions. Create a cohesive look by limiting yourself to three main finishes: one dominant material like white cabinetry, one accent like a bold backsplash, and one grounding element like wood-tone flooring. Save multiple versions of your design with different color schemes so you can compare them fresh the next day before making final decisions.
Step 6: Add Lighting and Create Multiple Views
Lighting transforms your 3D kitchen from a static model into a realistic preview of daily life. Start by placing light fixtures, overhead pendants, under-cabinet strips, and recessed ceiling lights, exactly where you plan to install them. Most software lets you adjust brightness and color temperature, so set warm tones (2700-3000K) for a cozy feel or cooler whites (4000K+) for a modern look.
Add windows to simulate natural light, then use your software’s time-of-day slider to see how sunlight moves through the space from morning coffee to evening dinner prep. This reveals shadows that might fall on your work surfaces and shows whether you’ll need task lighting in specific zones.
Create at least four saved views: a wide angle showing the entire layout, an eye-level perspective from the entrance, a close-up of your primary work zone, and a bird’s-eye view to check traffic flow. Many programs offer walkthrough animations, these help you experience moving through the space and spot issues like awkward door swings or tight corners that aren’t obvious in still images.
Expert Tips for Professional-Looking 3D Kitchen Designs
The difference between a convincing 3D kitchen design and one that screams “beginner” often comes down to a few expert touches that professionals apply instinctively.
Start with realistic proportions. Many first-time designers make cabinets too deep or countertops too narrow because the software defaults look reasonable on screen. Professional designers always verify that base cabinets sit at 24 inches deep, upper cabinets at 12 inches, and countertops at 25 to 26 inches deep with overhangs. These measurements create a kitchen that actually works in three dimensions, not just on your monitor.
Pay attention to clearances and traffic flow. You need at least 42 inches between facing cabinets or appliances for one cook, and 48 inches for two people working simultaneously. Door swings matter more than you’d think. Place your virtual camera at standing height and “walk” through your design, opening cabinet doors and appliance doors to spot collisions before they become expensive real-world problems.
Lighting transforms a flat rendering into something believable. Don’t rely on a single overhead source. Layer ambient ceiling lights with under-cabinet task lighting and consider where natural light enters at different times. Morning sun streaming through an east window changes how your backsplash color reads.
For polished visuals, skip the temptation to use every bold color and exotic material. Professional kitchens typically feature one statement element, whether that’s a dramatic backsplash or colorful cabinets, with the rest of the palette staying neutral. Real kitchens have imperfections too. Adding small details like visible grain in wood textures or slight variations in tile placement makes your design feel lived-in rather than sterile.
Verify Your Design: Final Checks Before Implementation

Before you share your design with contractors or start shopping for materials, walk through this final verification checklist to catch potential issues while they’re still easy to fix:
- Check clearances: Ensure cabinet doors and drawers have at least 3 inches of clearance when open, and verify that appliance doors (especially refrigerators and dishwashers) won’t block pathways or hit adjacent cabinets.
- Test the work triangle: Measure the distances between your sink, stove, and refrigerator, they should total between 13 and 26 feet with no single leg longer than 9 feet for efficient workflow.
- Verify counter space: Confirm you have at least 15 inches of counter next to the cooktop and 15 inches on the handle side of your refrigerator for landing zones.
- Review storage capacity: Count your drawer and cabinet cubic footage against your current kitchen items to ensure you’re not losing essential storage.
- Simulate movement: Virtually walk through your design imagining carrying groceries, cooking a full meal, or two people working simultaneously, tight spots will become obvious.
- Check material practicality: If your design includes wood elements near water sources, research maintenance requirements like how to remove mold or use vinegar cleaning methods to protect your investment.
Export several views of your design (overhead, eye-level walkthrough, and detail shots) to share with family members and contractors. Their fresh perspective often catches things you’ve overlooked after staring at the design for hours.
Common Questions About 3D Kitchen Design
Do I need to buy expensive software to create a 3D kitchen design?
Not at all. Free options like SketchUp Free, IKEA Kitchen Planner, and HomeByMe offer robust features that are perfect for most homeowners planning a kitchen renovation. Paid software typically adds advanced rendering capabilities and larger catalogs, but free tools are more than adequate for planning and communicating your vision to contractors.
How long does it take to learn 3D kitchen design software?
Most beginners can create a basic kitchen layout within 2-3 hours of first opening the software. Becoming comfortable with materials, lighting, and detailed customization usually takes a few practice sessions over a week or two, but you don’t need to master every feature to create a useful design.
Will contractors actually use my 3D design?
Yes, most contractors appreciate a clear 3D design because it eliminates guesswork about your expectations. They’ll use it as a starting point for accurate quotes and may suggest practical modifications based on their experience, but having a visual reference saves everyone time and reduces misunderstandings.
Can I import real product dimensions from manufacturers?
Many 3D design platforms include catalogs from major appliance and cabinet manufacturers with accurate dimensions. You can also manually input exact measurements from spec sheets to ensure your design reflects the real products you plan to purchase.
What if my kitchen has unusual angles or isn’t a perfect rectangle?
Modern 3D software handles irregular spaces well. You can adjust wall angles, account for sloped ceilings, and work around architectural features like support beams. Taking extra time with your initial measurements pays off when dealing with non-standard layouts.
Should I design multiple layout options or commit to one?
Create at least two or three variations if you’re torn between different approaches. The beauty of 3D design is how quickly you can duplicate your project and test alternative cabinet arrangements, island placements, or work triangle configurations without any real-world commitment.
These questions come up repeatedly in our community forums, and they reflect the concerns many homeowners have when starting their first 3D kitchen project. Remember that your design doesn’t need to be architect-level perfect to be useful. The goal is creating a clear vision that helps you make informed decisions about your space and communicate effectively with the professionals who’ll bring it to life.
What’s Next: From 3D Design to Kitchen Reality
Your 3D design is the blueprint that transforms your vision into reality. Start by exporting high-resolution images and walkthrough videos from your software, these become invaluable communication tools when discussing your project with contractors, ensuring everyone sees exactly what you’re planning. Share your design files with at least three kitchen specialists to get accurate, comparable quotes that reflect your specific layout and material choices.
Use your 3D model to finalize material selections by visiting showrooms with printouts of your design. You’ll find it much easier to match cabinet finishes, countertop samples, and tile options when you can reference the exact colors and textures from your visualization. Create a renovation timeline working backward from your desired completion date, accounting for lead times on custom cabinets (typically six to eight weeks) and appliances that may need ordering.
Throughout construction, refer back to your 3D design during site meetings to confirm placement of outlets, lighting fixtures, and cabinet positions. Contractors appreciate the clarity this provides, reducing the chance of expensive mid-project changes. When challenges arise, and they will, your digital model helps you evaluate alternative solutions quickly.
We’d love to see what you’ve designed! Share your 3D kitchen plans and renovation progress in the Gage Furniture community. Connect with other homeowners who’ve walked this path, swap contractor recommendations, and celebrate when your dream kitchen finally comes together. Your experience might be exactly what someone else needs to hear before starting their own project.