

You can clean wood furniture safely without stripping the finish by using a simple solution of mild dish soap and warm water, applied with a barely damp microfiber cloth. This gentle method removes everyday dust, fingerprints, and light grime while preserving the protective topcoat that keeps your furniture looking beautiful for years.
Most homeowners worry they’ll accidentally damage their furniture’s finish when cleaning, and that concern is valid. Harsh chemicals, abrasive scrubbers, and even too much water can cloud, scratch, or strip the protective layer your wood needs. The good news? You don’t need specialty products or complicated techniques to keep finished wood furniture spotless.
What matters most is understanding that the finish, whether it’s polyurethane, lacquer, or varnish, creates a barrier between the wood and your cleaning tools. Your job is to clean that protective surface without penetrating or wearing it down. That means working with minimal moisture, soft materials, and pH-neutral cleaners.
We’ve tested and ranked multiple cleaning methods from gentlest to slightly more intensive, so you can start with the safest approach and only move to stronger options if needed. Each method includes verification steps so you’ll know your finish remains intact. Whether you’re maintaining a dining table that sees daily use or refreshing a vintage dresser, you’ll find a proven technique that fits your furniture’s needs and your comfort level.
Understanding Wood Furniture Finishes
Before you begin cleaning, it helps to know what you’re dealing with. Most wood furniture has one of five common finishes, and recognizing yours makes a big difference in choosing the safest cleaning approach.
Polyurethane is the workhorse of modern furniture finishes. This tough, plastic-like coating creates a hard protective shell over the wood and resists water, alcohol, and daily wear. You’ll find it on most contemporary dining tables, dressers, and cabinets. Despite its durability, polyurethane can still cloud or dull if you use harsh chemicals or excessive water.
Lacquer creates a beautiful, glossy surface that dries quickly during manufacturing. It’s common on Asian-inspired furniture and vintage pieces from the mid-century. While it looks stunning, lacquer is more delicate than polyurethane, alcohol and ammonia-based cleaners will damage it quickly.
Shellac is a traditional finish made from natural resin. You’ll often find it on antique furniture and classic pieces. It buffs to a warm glow but dissolves in alcohol, making it the most vulnerable finish to common household cleaners.
Oil finishes penetrate the wood rather than sitting on top. They give furniture a natural, hand-rubbed look and feel slightly different to the touch, less glassy, more organic. Danish oil and tung oil are popular choices. These finishes need gentler care since they don’t create a hard barrier.
Wax finishes provide minimal protection and require regular reapplication. They’re sometimes layered over other finishes for added sheen. Wax is soft and can be removed easily by harsh cleaners or excessive scrubbing.
Not sure which finish you have? Look at how light reflects off the surface. High-gloss, mirror-like reflections usually indicate lacquer or polyurethane. A softer, more matte appearance with a hand-rubbed feel suggests oil or wax. When in doubt, treat your furniture as if it has the most delicate finish, you can always increase cleaning strength if needed, but you can’t undo finish damage.
Tools and Materials You’ll Need
Before you start cleaning, gather these supplies to protect your furniture’s finish while effectively removing dirt and grime. Having the right tools on hand means you won’t rush or improvise with something potentially harmful.
Essential Supplies:
- Microfiber cloths (at least 3-4 clean ones), soft, lint-free, and won’t scratch finishes
- Soft-bristled brush or clean paintbrush, for reaching crevices and carved details
- Distilled water, prevents mineral deposits that tap water can leave behind
- Mild dish soap (Dawn or similar), pH-neutral formulas work best
- White vinegar, natural cleaning power without harsh chemicals
- Spray bottle, for controlled application of cleaning solutions
- Clean terry cloth towels, for drying immediately after cleaning
Optional for Tougher Jobs:
- Commercial wood cleaner (pH-neutral, like Murphy’s Oil Soap or Weiman), choose products specifically labeled safe for finished wood
- Mineral spirits, for sticky residue or wax buildup, use sparingly
- Cotton swabs, precise cleaning for detailed areas
- Furniture polish or wax, for after cleaning, not during
Equally important is knowing what to avoid. Never use ammonia-based glass cleaners, bleach, furniture polishes with silicone (they build up and attract dust), abrasive sponges or scrub pads, or excessive amounts of any liquid. These products can cloud, strip, or permanently damage your finish. When in doubt about a commercial product, check the label for “safe for finished wood” before applying it to your furniture.
Safety Precautions and Preparation
Before you begin any cleaning method, take these safety steps to protect both your furniture and yourself.
Always start by testing your chosen cleaner on a hidden spot, underneath the furniture, inside a drawer edge, or on the back panel. Apply a small amount, wait 10 minutes, then check for cloudiness, color change, or texture differences. This simple test can save you from ruining a visible surface.
Work in a well-ventilated room, especially when using vinegar solutions, commercial cleaners, or mineral spirits. Open windows and run a fan if needed. Strong fumes can cause headaches and irritation.
Clear the furniture surface completely and remove any loose items from drawers. Lay down old towels or drop cloths to protect your floor from drips. If you’re cleaning something large like a dining table, work in sections to maintain control.
Dust thoroughly with a dry microfiber cloth before applying any liquid. Wet dust turns into muddy streaks that are harder to remove and can scratch the finish.
Know your limits. If you encounter extensive water damage, deep scratches in the finish, or antique pieces with original finishes, consult a professional furniture restorer. Some situations require expert assessment rather than home cleaning methods.
7 Safe Cleaning Methods Step-by-Step
Method 1: Dry Dusting and Microfiber Wiping
Dry dusting is your safest starting point for routine cleaning, it removes surface dirt without introducing any risk to the finish. This method works best for weekly maintenance or when you notice a light coating of dust on tabletops, shelves, or chair backs.
Start with a clean, dry microfiber cloth. These cloths trap dust particles in their fibers rather than pushing them around or scratching the surface. Avoid old t-shirts or paper towels, which can leave lint behind or create fine scratches.
- Fold your microfiber cloth into quarters to create a thick, cushioned cleaning surface with multiple clean sides.
- Wipe in the direction of the wood grain using gentle, straight strokes, never circular motions that can highlight existing scratches.
- Refold the cloth to a clean section as it collects dust, and shake it out outdoors or over a trash bin when all sides are dirty.
- For carved details or crevices, use a soft-bristle brush (like a clean paintbrush) to dislodge dust, then wipe away with your microfiber cloth.
- Finish by inspecting the surface at an angle to catch any remaining dust streaks in the light.
This approach handles most day-to-day dust without any moisture exposure. If you spot sticky residue or actual grime during your dusting, that’s your signal to move to one of the slightly stronger methods, but for regular upkeep, dry dusting preserves your finish perfectly while keeping furniture looking fresh.
Method 2: Damp Cloth with Distilled Water
When dry dusting isn’t enough to remove light fingerprints or surface smudges, a damp cloth with distilled water is your next safest step. The key word here is damp, not wet, your cloth should feel barely moist to the touch, never dripping or soaking.
Start by dipping your microfiber cloth in room-temperature distilled water (tap water can leave mineral deposits), then wring it out thoroughly until you can’t squeeze any more water from it. Wipe the furniture gently in the direction of the wood grain, using smooth, even strokes. Work in small sections, about two feet at a time.
Immediately follow with a completely dry microfiber cloth to remove any remaining moisture. Don’t let water sit on the surface for more than a few seconds, prolonged exposure can seep into the finish and cause cloudiness or water rings. This method works beautifully for weekly cleaning of lightly used pieces.
Method 3: Mild Soap Solution
When water alone isn’t enough, a mild soap solution tackles light grease and grime effectively. Mix just two to three drops of gentle dish soap, avoid varieties with degreasers or moisturizers, into one quart of warm distilled water. The key is keeping the solution extremely diluted; more soap creates residue that dulls your finish.
Dip your microfiber cloth into the solution and wring it thoroughly until it’s barely damp, not wet. You should be able to touch the cloth to paper without leaving moisture behind. Wipe the wood surface gently in the direction of the grain, working in small sections. Immediately follow with a separate cloth dampened only with clean water to remove any soap residue, then dry completely with a third clean cloth.
Never let soapy water pool on the surface or seep into joints and crevices where it can damage the finish from beneath.
Method 4: Vinegar Solution for Stubborn Grime
When soap and water can’t budge sticky residue or built-up grime, a vinegar solution offers the next level of cleaning power without threatening your finish. Mix one part white vinegar with three parts distilled water, this 1:3 ratio is mild enough for most finishes yet effective against grease and film.
Dip your microfiber cloth into the solution and wring it thoroughly until barely damp. Work in small sections, wiping gently along the grain. The acetic acid in vinegar cuts through stubborn deposits that plain water misses, but never let it puddle or sit on the surface. Immediately follow with a clean, damp cloth to remove any vinegar residue, then dry completely with a fresh towel.
Test this method in an inconspicuous spot first, some delicate finishes like shellac may react to vinegar’s acidity. If you notice any clouding during your test, stick with gentler methods instead.
Method 5: Commercial Wood Cleaners
Commercial wood cleaners offer a convenient, pre-formulated solution when homemade mixtures feel too risky. Look for products explicitly labeled “pH-neutral” or “safe for finished wood”, these won’t strip protective coatings like harsh alkaline or acidic cleaners can. Avoid anything containing silicone, ammonia, or petroleum distillates, which can leave residue or cloud finishes over time.
Check the label for terms like “non-abrasive” and “no-wax formula.” Products designed for hardwood floors often work well on furniture too. Quality brands like Bona, Weiman, and Howard Products offer reliable options, though store brands can work if they meet the pH-neutral standard.
Application is straightforward: spray a small amount onto your microfiber cloth, never directly on the furniture, then wipe following the wood grain. These cleaners typically dry quickly without leaving streaks. Start with a hidden area to confirm compatibility with your specific finish, especially on antique or delicate pieces.
Method 6: Oil Soap for Deeper Cleaning
Oil soap offers a middle-ground solution when water-based methods haven’t quite cut through accumulated grime, but you’re not ready for harsh solvents. Murphy’s Oil Soap and similar vegetable oil-based cleaners contain mild surfactants that lift dirt while depositing a thin protective layer.
Mix one to two tablespoons of oil soap per gallon of warm water, less is more here, as concentrated solutions leave sticky residue. Wring your cloth until barely damp, then wipe following the wood grain in small sections. The key difference from regular soap: oil cleaners don’t require a rinse step, but you should immediately follow with a dry cloth to prevent buildup.
Use this method quarterly for dining tables or monthly for kitchen cabinets that face cooking grease. Avoid oil soap on unfinished wood or waxed surfaces, where it can create a murky appearance. If your furniture feels tacky an hour after cleaning, you’ve used too much product.
Method 7: Mineral Spirits for Sticky Residue
When wax buildup, adhesive residue, or sticky spots resist gentler cleaning methods, mineral spirits offer a solution that won’t harm most furniture finishes. This solvent-based approach requires extra care but effectively dissolves stubborn residue that water-based cleaners can’t touch.
Start by testing on an inconspicuous area and waiting 24 hours to confirm no adverse effects. Dampen a clean, white cloth with a small amount of mineral spirits (never pour directly onto furniture), then gently rub the sticky area using circular motions. The residue should dissolve within seconds. Immediately wipe the area with a separate cloth dampened with distilled water to remove any solvent residue, then dry thoroughly with a clean microfiber cloth.
This method works particularly well on polyurethane and lacquer finishes but requires caution with shellac or oil finishes, which may soften under prolonged exposure. Use mineral spirits only when necessary, it’s your strongest cleaning option short of professional refinishing. Wear gloves to protect your hands, and never leave mineral spirits sitting on the surface for more than a few seconds before wiping clean.
How to Verify Your Finish Is Intact
After cleaning your wood furniture, take a few minutes to check that the protective finish survived the process. This verification step gives you peace of mind and helps you catch any issues before they worsen.
Start with a visual inspection under good lighting. Run your eyes across the entire cleaned surface, looking for any cloudiness, haziness, or dull patches that weren’t there before. A healthy finish should look clear and uniform. If you notice white rings or foggy areas, that’s moisture trapped under or within the finish, a warning sign that your cleaning method was too aggressive or the surface stayed wet too long.
Next, do a touch test. Gently run your fingertips across the wood in several spots. The surface should feel smooth and consistent, just as it did before cleaning. Rough patches, sticky spots, or areas that feel different from the rest suggest the finish has been compromised. Trust what your fingers tell you.
The water bead test is your most reliable verification tool. Place a small drop of water on an inconspicuous area and watch what happens. On intact finish, water should bead up and sit on the surface rather than soak in. If the water spreads out or darkens the wood beneath, the finish has worn through in that spot.
A protected finish shows these signs:
- Water beads up rather than absorbing into the wood
- Surface appears uniformly glossy or satin (matching its original sheen)
- No white rings, cloudy patches, or hazy areas
- Smooth, consistent texture with no rough or sticky spots
- Wood grain visible but sealed beneath a clear protective layer
Remember that dirt sometimes mimics finish damage. A dull appearance might just mean residue from your cleaning solution dried on the surface. Try buffing with a clean, dry microfiber cloth first. If the dullness disappears, you were looking at leftover cleaner, not finish damage.
Common Mistakes to Avoid
Even experienced furniture owners make mistakes that strip away protective finishes. The most common culprit? Excessive water. Letting moisture pool on wood surfaces or using a soaking-wet cloth penetrates the finish and causes cloudiness, swelling, or white rings that require professional refinishing to fix.
Harsh chemicals like ammonia, bleach, or all-purpose cleaners containing solvents eat through finishes surprisingly fast. One community member learned this the hard way after using a kitchen degreaser on an antique table, removing a century-old shellac finish in minutes. If you discover mold on your furniture, follow proper remove mold protocols rather than attacking it with bleach.
Abrasive scrubbing with rough sponges, steel wool, or stiff brushes scratches finishes permanently. Similarly, silicone-based furniture polishes create a waxy buildup that makes future refinishing nearly impossible, professionals refuse to work on silicone-contaminated pieces because new finishes won’t adhere properly.
Finally, ignoring spills leads to irreversible damage. Water rings and heat marks become permanent within hours. Wipe up accidents immediately, even if it means interrupting dinner. Proper mold cleanup also requires quick action before spores penetrate the finish.
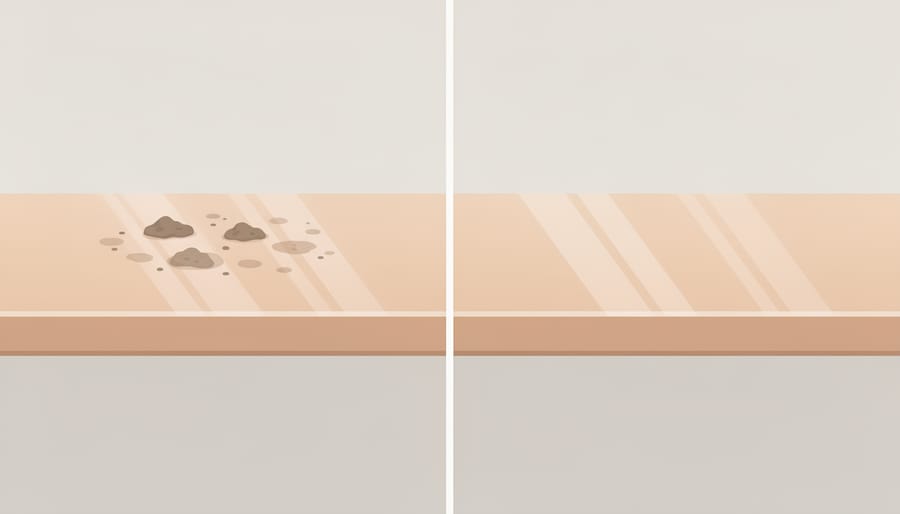
Maintenance Tips for Long-Term Protection
Regular maintenance keeps your wood furniture looking beautiful while protecting its finish for years. Clean your pieces weekly with a dry microfiber cloth to prevent dust buildup, this simple habit prevents the need for deeper cleaning later.
Always use coasters under drinks and placemats under hot dishes. Even minor moisture rings can penetrate damaged finish over time. Wipe spills immediately with a soft, dry cloth before they have a chance to sit.
Control humidity levels between 40-50% in rooms with wood furniture. Excessive moisture can warp wood or encourage issues requiring wood mold removal while overly dry air causes cracking. A simple room humidifier or dehumidifier maintains ideal conditions.
Consider rewaxing furniture every 6-12 months if you have wax-finished pieces. Apply a thin coat of paste wax following the manufacturer’s instructions. For polyurethane finishes, skip waxing, occasional polishing with a furniture-specific product provides adequate protection.
Rotate decorative items periodically to prevent uneven fading from sunlight exposure. Moving that vase or lamp once a month helps your furniture age uniformly and look consistently beautiful.
Frequently Asked Questions
How often should I clean my wood furniture?
Dust weekly with a dry microfiber cloth, and do a damp cleaning every 2-3 months for pieces in regular use. High-traffic surfaces like dining tables may need cleaning monthly, while display pieces can go longer between cleanings.
Can I use Pledge or other spray polishes on finished wood?
Avoid silicone-based sprays like many commercial furniture polishes, they create buildup that attracts dust and can cloud your finish over time. Stick with cleaners specifically designed for wood furniture or simple soap-and-water solutions.
What removes water rings without damaging the finish?
Try rubbing gently with a paste of baking soda and water, or use mayonnaise left on overnight. For stubborn rings, a small amount of mineral spirits on a cloth often works, but test first in a hidden spot.
How do I clean sticky residue from tape or stickers?
Apply a few drops of mineral spirits to a cloth and gently rub the residue. The spirits dissolve adhesive without harming most finishes, but always test first and work in a ventilated area.
When should I call a professional instead of cleaning myself?
If you see finish peeling, deep scratches exposing raw wood, or suspect mold growth, consult a professional. Also seek expert help for valuable antiques or when you’re uncertain about the finish type.
Does cleaning help prevent mold on wood furniture?
Regular cleaning removes the dust and organic matter mold feeds on. Keep humidity below 60 percent and wipe furniture in damp spaces monthly to prevent mold from taking hold.
These questions cover the concerns most readers face when maintaining their furniture. The key is starting conservatively, if a gentle method works, there’s no need to escalate to stronger cleaners. Your finish will last longer with regular, simple care than with occasional aggressive cleaning.
Protecting your wood furniture’s beautiful finish doesn’t require specialized skills or expensive products. By starting with the gentlest cleaning method and working your way up only when necessary, you’ll keep your pieces looking their best for years to come. Remember, the key is patience and a light touch, most dirt and grime respond well to simple soap and water or a quick pass with a microfiber cloth.
Your furniture has likely been part of countless family moments, and with these safe cleaning techniques, it will continue to be. Whether you’re maintaining heirloom pieces or caring for newer additions, these methods will save wood furniture from unnecessary damage while keeping surfaces clean and inviting.
We’d love to hear about your experiences! What cleaning method worked best for your furniture? Share your tips and questions in the comments below, your insights help fellow homeowners care for their cherished pieces.
How to Clean Wood Furniture with Vinegar Without Damaging the Finish
You can <a href="https://www.gagefurniture.com/furniture-care-and-cleaning/how-to-clean-wooden-pieces-at-home/">clean wood furniture</a> safely without stripping the finish by using a simple solution of mild dish soap and warm water, applied with a barely damp microfiber cloth. This gentle method removes everyday dust, fingerprints, and light grime while preserving the protective topcoat that keeps your furniture looking beautiful for years. Most homeowners worry they’ll accidentally damage their furniture’s finish when cleaning, and that concern is valid. Harsh chemicals, abrasive scrubbers, and even too much water can ...